Raspberry Pi Live-Stream Build
Here are the steps for building an HDMI based live-streaming computer using a Raspberry Pi as the processor and a Lintest PiCapture HD1 as the capture device.
This guide assumes that you have the parts listed here. At a minimum you’ll need parts 1 through 6 and 15 and 16.
Install Operating System and Basic Configuration

Step 1 - Install Raspbian Stretch on the micro SD card
You’ll need the official Raspberry Pi operations system, known as Stretch, for this install.
The site linked below has an excellent installation guide.
I highly recommend using the image burner called “balenaEtcher”, it makes the whole process super easy and point-n-click.
All of the steps are explained on the Raspbian Stretch download site, linked below by clicking the button.

Step 2 - Boot Up
Insert the micro SD card into the Raspberry Pi’s micro SD card slot
Connect a USB mouse and keyboard,
Connect your Raspberry Pi to an HDMI monitor or television,
Plug the Raspberry Pi into the power supply.
Once you’ve hooked up and powered on you’ll see the Raspbian Stretch boot up screen and then the desktop interface.

Step 3 - Configure Raspbian
Next, you’ll need to do some initial basic setup of the Raspbian Stretch operating system.
Using the mouse, select the Menu item in the upper left corner of the screen
Choose Preferences
Choose Raspberry Pi Configuration
Click the Expand Filesystem button
Click the Interfaces tab
Note, depending on which version of Stretch you have you may not see all of these options. I noticed in a later build that the “Expand File System” option wasn’t available and the filesystem was expanded already upon first boot.
Install FFMPEG
Step 4 - High performance FFMPEG installation
There are a lot of tutorials on how to install FFMEG on Raspbian.
Here’s one in particular that is drop dead simple* and also enables all the high performance options that we’ll want for live-streaming. Thank you to RPi_Mike for putting this monster install script together. It’s a work of art!
Follow the instruction on the page linked below exactly as described and come back here after about an hour.
* relatively speaking, it’s still somewhat technical
Install and test the Lintest PiCapture HD1


An official Raspberry Pi 7” touchscreen, touchscreen controller card, Raspberry Pi 3 B, and Lintest PiCapture HD1 sandwich. This is how all the parts fit together.
Step 5 - PiCapture hardware install
The Lintest PiCapture HD1 comes with instructions included in the box.
The company’s website also has some great documentation and a fairly active forum.
Visit the Lintest installation document site by clicking the button below.
NOTE: you’ll want to leave the jumpers in their default configuration. There’s nothing special you need to do in order to get the PiCapture up and running other than the basic hardware installation described in the included documentation or on the company’s website.

Step 6 - Test HDMI handshake
Plug your HDMI output from the camcorder to the PiCapture HD1 input and turn on the camcorder making sure that the video signal is going out through the HDMI port on the camcorder.
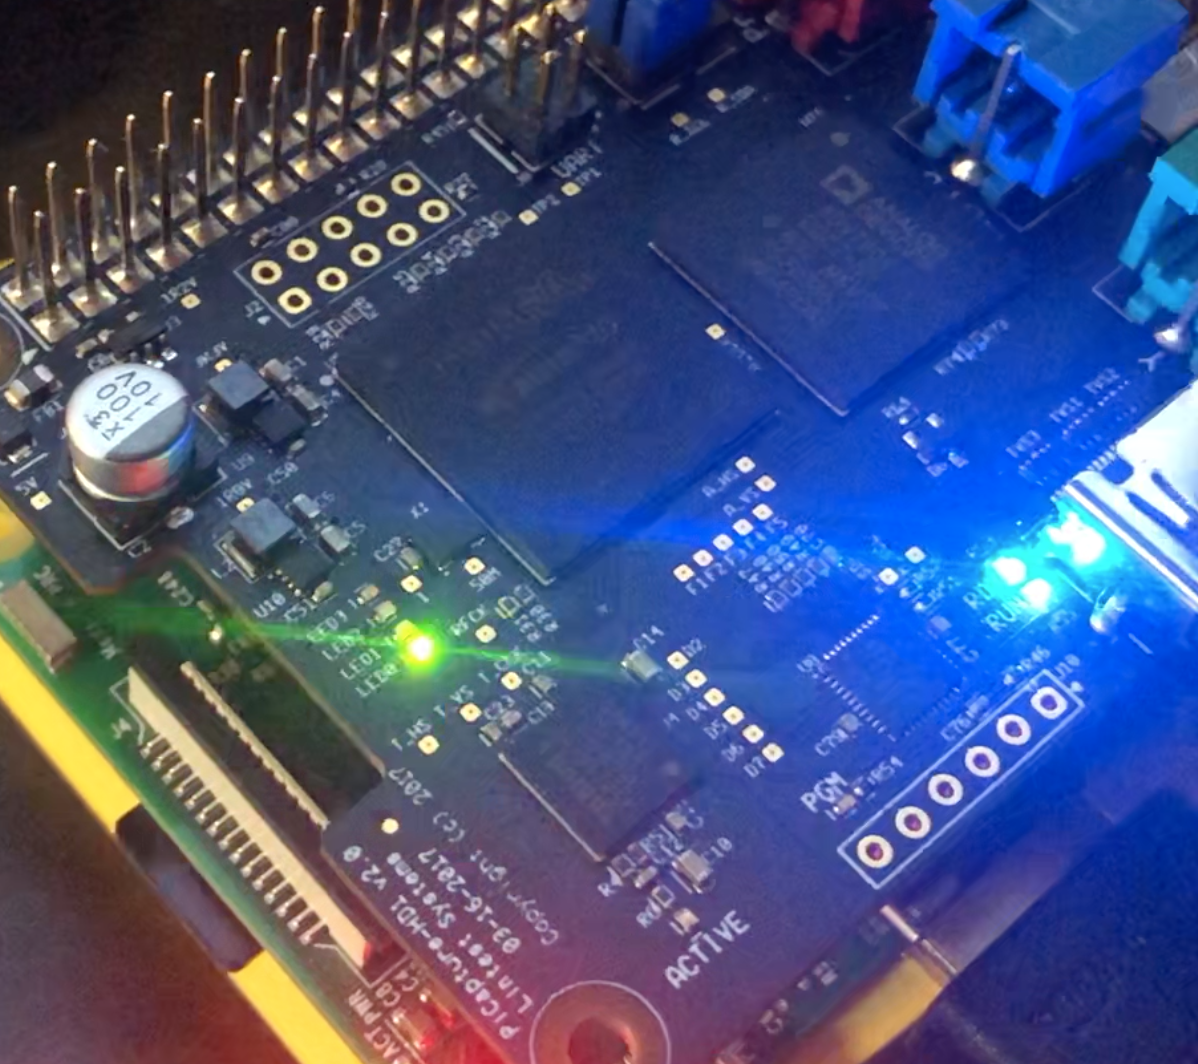
Two steady blue lights and a flashing green light. We’re ready to go!
You should see the PiCapture HD1 blue indicator lights illuminate like the first image.
If you see two steady blue lights next to the HDMI input and LED0, LED1, LED2 are flashing and LED3 is steady, then congratulations! You’re ready to move onto Step 7.

A green light or only one blue light means there’s an issue with the video signal coming into the PiCapture HD1. Is the camera on and is video signal being output from the HDMI out port?
If, like me, you only see the first blue light, as seen in the second image or all of the green LEDs are flashing, then you probably need to buy an EDID emulator. Keep on reading.
I’m not ashamed to admit it, this was a real head-scratcher when I did my first install.
HDMI devices have a hand-shaking protocol called EDID that determines the resolution and refresh rate that will be used when displaying images.
HDMI connections from my HD camcorder, blu-ray player, gaming console or computer to my HD television always “just worked”, so I assumed that when I plugged my Canon Vixia HF R800 into the PiCapture HD1 that it would “just work”.
Well… not so much. The Canon Vixia HF R800 and the PiCapture HD1 decided to default to the lowest resolution available on the PiCapture HD1, in other words, 480P.
Some lower end consumer camcorders and most higher end DSLRs have the ability to “force” a 1080P HDMI out signal. Many, or most, consumer level camcorders don’t have that option available to the user. So in order to “force” the PiCapture to see my Canon Vixia HF R800 as a 1080P capable device or vice versa, to get the PiCapture HD1 to see the Canon as a 1080P device, I installed an EDID emulator between the Canon and the PiCapture HD1.

Here’s what the EDID emulator (that gold section) looks like when it’s hooked up to the HDMI cables between the camcorder and PiCapture HD1.
Now that you have the EDID emulator installed, turn on the Raspberry Pi and the camcorder, making sure the video signal is going out through the HDMI port, and you should now see all the pretty blue lights illuminated on the PiCapture HD1. Yes? I hope so!
Time to move onto testing the PiCapture HD 1.
PiCapture HD1 Test

Scrambled video signal

Clean video signal
Step 7 - PiCapture HD1 Image and Video Testing
The PiCapture HD1 acts just like the official Raspberry Pi camera module. In other words, all of the camera module commands work exactly the same for the PiCapture HD1. So you can use your HD camcorder as a still camera or a video camera. You can use it to create stop motion videos, or time-lapse videos or apply cool or obnoxious video affects to the images or video. There are many many commands available for the Raspberry Pi camera.
We’re going to focus on just a few of those commands in order to create a visually pleasing video signal for our live-streaming.
But before we can try out different commands we need to make sure we are getting a good video signal from the camcorder and PiCapture HD1.
With the Raspberry Pi powered on and running and the camcorder connected to the HDMI input on the PiCapture HD 1 we’re going to test the video input signal. Follow these steps:
From the Raspberry Pi main menu, click on the Command menu item
Type or copy and paste the following at the prompt. This will record a 10 second video at 1080p 30fps.
raspivid -o video.h264 -t 10000 -md 1 -awbg 1.0,1.0 -awb off -ex off -p 227,74,560,336 -op 255You should hopefully see a clean and clear image appear on the screen. You may see a scrambled image similar to the screenshot. In this case, do the following:
3a. Close the Command prompt window
3b. Unplug the HDMI cable from the camcorder
3c. Plug the HDMI cable back into the camcorder
3d. Try steps 1 through 3 again
Close the Command prompt to end the video preview
If you do see a scrambled image, most of the time, unplugging the HDMI cable and plugging it back in will correct the video image.
With the video signal coming into the Raspberry Pi cleanly, it’s time to give streaming a try.
USB Audio Setup
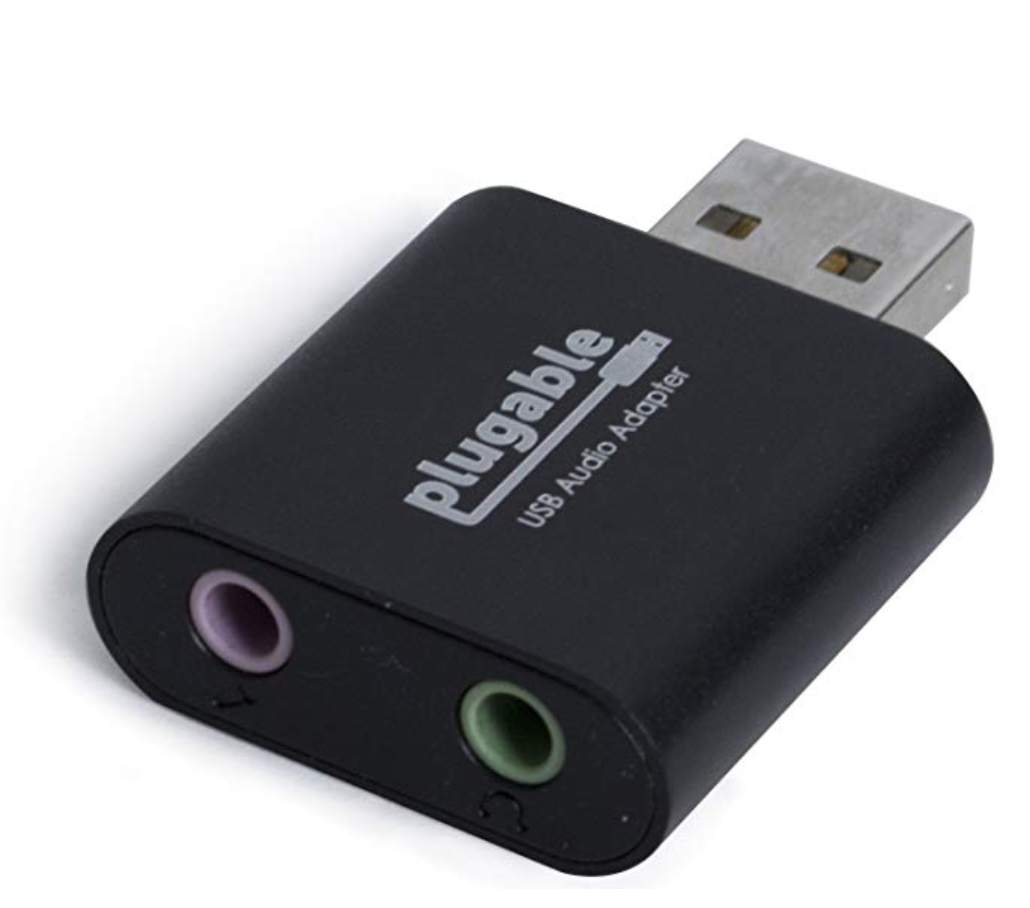
An adapter like this one allows you to hook up a high-quality external boom microphone to your Raspberry Pi
Step 8 - Configure The USB Audio Input
There’s an easy to follow guide here explaining how to setup a USB audio input on Raspberry Pi.
This works for any USB Audio input device, including an external boom microphone.
You’ll need to get this setup before testing the streaming command below as the FFmpeg command expects to find an audio input.
Streaming Setup

Finishing up a 4 hour live stream capturing a big snow fall we had in February 2019.
Step 9 - Configure The Stream Command
In order to stream video from the Raspberry Pi to the internet, you need a destination for the video stream.
I use YouTube LiveStream. It works well for me and sharing a link to the livestream with family and friends is really easy and people don’t need an account to view the stream. You can also stream to Facebook, Twitch, and any RTMP (real-time messaging protocol) compliant server.
There are plenty of helpful articles on the web about setting up the YouTube, Facebook, Twitch, etc. server for accepting your livestream. Here’s YouTube’s FAQ guide.
Every stream has a unique key. As YouTube rightly emphasizes, don’t share your key with anyone because with it anyone could stream to your account, essentially impersonating you. Don’t worry too much though as it’s easy to generate a new key and deactivate the old key.
Alright, assuming you have a YouTube account (or some other online video streaming service account) and you have your stream key, here’s the FFmpeg command that I’ve found to be reliable and works with the hardware outlined in this build:
raspivid -o - -t 0 -fli auto -ISO 100 -mm matrix -co 30 -br 40 -sa 40 -awbg 1.0,1.0 -awb off -ex off -md 1 -fps 30 -b 2500000 -p 227,74,560,336 -op 255 | ffmpeg -thread_queue_size 11000 -use_wallclock_as_timestamps 1 -i - -itsoffset 0.5 -fflags nobuffer -thread_queue_size 11000 -f alsa -ac 1 -i hw:1,0 -vcodec copy -acodec aac -ac 1 -ar 48000 -g 50 -strict experimental -f flv rtmp://a.rtmp.youtube.com/live2/<<steam key goes here>>Here’s a breakdown of this command.
The first part, the text before the | character is the Raspivid command for generating the video as a pipe into FFmpeg for muxing with the audio input and then streaming out to the live streaming server.
raspivid -o - -t 0 -fli auto -ISO 100 -mm matrix -co 30 -br 40 -sa 40 -awbg 1.0,1.0 -awb off -ex off -md 1 -fps 30 -b 2500000 -p 227,74,560,336 -op 255This part of the command is pretty straight-forward. The important point here is that the -o parameter is left empty, which specifies that you want the video output to go into a stream and not a file. The other important parameter is -p which specifies the size and placement of the video preview window. It’s important to leave the preview window smaller than full screen in order to access other parts of the interface during the live streaming session.
The next part of the command specifies how ffmpeg should process the audio and video inputs. A typical FFmpeg command structure is the following:
ffmpeg [global_options] {[input_file_options] -i input_url} ... {[output_file_options] output_url} ...The FFmpeg command can take multiple inputs and in our case we will have one output, the video/audio stream.
ffmpeg -thread_queue_size 11000 -use_wallclock_as_timestamps 1 -i - -itsoffset 0.5 -fflags nobuffer -thread_queue_size 11000 -f alsa -ac 1 -i hw:1,0 -vcodec copy -acodec aac -ac 1 -ar 48000 -g 50 -strict experimental -f flv rtmp://a.rtmp.youtube.com/live2/<<steam key goes here>>Let’s break this down into more discreet parts:
Immediately after FFmpeg are the video command flags:
-thread_queue_size 11000 -use_wallclock_as_timestamps 1-i -The first one defines our packet queue size. I’ve tried a lot of queue sizes and 11000 seems to work very reliably. This is extremely important as the stream will start to lose packets and hence frames, causing glitches in the stream and the video. The second command syncs up the audio and video using the system clock as a timer. The last one indicates that the video is coming in from the pipe defined before the | symbol.
The next set of commands are the audio command flags:
-itsoffset 0.5 -fflags nobuffer -thread_queue_size 11000 -f alsa -ac 1 -i hw:1,0The first one defines a delay for the audio of .5 seconds. This is a number that you may need to experiment with. I tried various seconds and found that a half-second delay was perfect for synchronizing the audio and video.
The next command -fflags optimizing the processing for live streaming. We want to take the input directly and mux it with the video.
The third one -thread_queue_size does the same thing with the audio as video by increasing the packet queue size. This number seems to be more important for audio than the video in my experience. Most of the issues I’ve encountered while streaming are related to an audio queue overflow and a value of 11000 seems to eliminate that issue, even for 2+ hour streams.
The next one -f defines the audio format as alsa, which is how the Raspberry Pi is configured to use the external microphone.
The next one -ac defines the audio channel.
The last one -i defines the actual audio input as coming from hardware. For the Raspberry Pi setup, it’s defined as hw:1,0
Here’s a description of the rest of the command.
-vcodec copy -acodec aac -ac 1 -ar 48000 -g 50 -strict experimental -f flv rtmp://a.rtmp.youtube.com/live2/<<steam key goes here>>vcodec copy tells ffmpeg to copy the input stream to the output stream with no additional processing.
acodec aac tells ffmpeg that the audio format is aac.
ac tells ffmpeg that the audio is on hardware channel 1
ar tells ffmpeg that the audio is at 48Khz
g tells ffmeg to make a key frame every 50 frames. Usually this is 2x the framerate of your source. So this could be 50 or 60 depending on the framerate.
Start Streaming
Step 10 - Start the stream
NOTE: You’ll need to be connected to a wifi network in order to stream. I use a Verison MiFi Jetpack and I’ve used the iPhone’s hotspot in the past. Sometimes the high school or event location will have wifi and it will sometimes work. I’ve decided to try and rely on the MiFi Jetpack because I have tested against that connection and I know how well it performs. It’s up to you and it may take some trial and error to find the right wifi connection that works for you in the locations you film.
I recommend copying the stream command into a Leafpad document for future use. That way you can open the Leafpad document and copy and paste from there. Leafpad is the built in text editor on Raspbien Stretch. It’s found in the Accessories menu.
I follow these steps every time I stream.
Get to the event early. I recommend giving yourself 30 minutes to setup
Setup your equipment: the tripod, the Raspberry Pi, the camera, the microphone and battery pack.
Once everything is connected and powered on, I test the camera, following the steps above in “PiCapture HD 1 Test”. This ensures that the PiCapture HD1 is getting a good signal from the camcorder. Once I know that is working I feel ready to start the stream.
To start the stream:
a.Open a Command Prompt window
b. Copy the streaming command from the Leafpad document to the Command Prompt
c. Press the enter key on the virtual keyboard as needed to execute the command (see below on installing a virtual keyboard)
d. After a few seconds you should see the stream start and FFMpeg will display the Frame Count, Frames Per Second, Total Time and a few other stats on the stream
If all goes well you can just let it run.
If for some reason you get an ALSA buffer xrun error you can usually let one or two of these errors go by and the stream will be ok. If you get several of them in a row then I recommend ending the stream by closing the Command Prompt. Follow steps 4a. through d. to start a new stream right away. If you get a new stream started within 15 seconds or so YouTube will keep the stream open and it will all end up as one video file when the stream is finished. If you go more than about 15 seconds YouTube will end the stream and your new stream will be in a new file.
That’s about it.
I’ll continue to refine this guide as I learn more. I’m researching a method to use OBS Studio to provide graphic overlays on the stream and perhaps have two cameras running and being able to switch between the streams. I’m looking into using a LattePanda V1.0 system for this as the Raspberry Pi 3 isn’t powerful enough to run OBS Studio. More to come on that.
A few more options

Change the brightness of the monitor
sudo sh -c "echo 80 > /sys/class/backlight/rpi_backlight/brightness"0 = The LCD backlight is off; 255 = The LCD backlight is at full brightness
Rotate the LCD view
This may be helpful if you want to mount the Official 7” Touchscreen “upside down”
Here’s the best answer in the Raspberry Pi forums on this topic and the one I used which worked great: https://www.raspberrypi.org/forums/viewtopic.php?t=135364#p909042
Install A Virtual Keyboard
This saves you from having to lug around a USB connected keyboard.
Here’s an easy guide for installing “matchbox keyboard”. This one works well and is easy to use.
No Audio In Stream
Here’s a modified streaming command that removes the audio for those wanting to have video and no audio in the stream. I’ve bolded the relevant section of the command. This command comes courtesy of Tommy Leonhardsen. Thanks Tommy!
The relevant section of the command is in the ffmpeg line and is “-ac 2 -i /dev/zero”.
raspivid -o - -t 0 -fli auto -ISO 100 -mm matrix -co 30 -br 40 -sa 40 -awbg 1.0,1.0 -awb off -ex off -md 1 -fps 30 -b 2500000 -p 227,74,560,336 -op 255 | ffmpeg -thread_queue_size 11000 -use_wallclock_as_timestamps 1 -i - -itsoffset 0.5 -fflags nobuffer -thread_queue_size 11000 -ar 44100 -ac 2 -acodec pcm_s16le -f s16le -ac 2 -i /dev/zero -vcodec copy -acodec aac -ac 1 -ar 48000 -g 60 -strict experimental -f flv rtmp://a.rtmp.youtube.com/live2/<<stream key>>